
This comprehensive guide covers all aspects of segmented wooden turnings. Keeling also discusses changes in technology and safety issues when working with wood. There are 10 projects in the book, each with varying levels of difficulty. Also included is a gallery showing some inspiring segments. The book is intended to help beginners learn about segmented turnings but it is not meant to be an exhaustive resource for those who want to make the most beautiful turniments.
Techniques
William Smith offers step-by-step instructions for creating segmented-turned objects in Techniques for Segregated Wood Turnings. This woodworking technique is great for creating complex vessels that have intricate details. This technique is ideal for beginners. It is important to have a basic understanding of woodworking before you can begin. You should have some experience in the art of turning. After mastering the basics, you can move on to more advanced techniques.
Materials
There are several ways to create segmented wood turnings. You can use ring, stave, or solid, non-segmented construction to create segmented wood turnings. Wood expands in a perpendicular direction to the grain. The turner must be aware of the non-parallel grain directions, and take precautions to prevent damage to the piece. This book will give you an overview of the various styles and types you can use to turn wood.
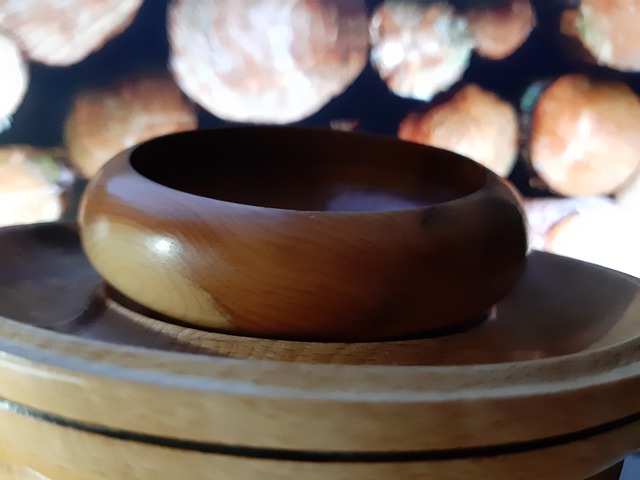
Feature Rings
Many segmented boxes have a unique feature: Feature rings. The zigzag elements turn on their sides create a lightning-like design in the ring of the segmented bowl. The finished turning is sanded to 600 grit and filled with clear lacquer. These ring shapes are an excellent choice for home decor or as gift items. This 120-minute DVD shows you how segmented dishes can be made.
Ring construction
You can make rings for segmented wood turns in a variety of ways, including using both ring and stave construction. This technique can also work with non-segmented solid wood. Wood expands in a direction perpendicular to its grain and moisture content. The shape of the ring may be affected if the grain is not parallel. Therefore, the turner must account for this when designing the segmented turned.
Stave construction
There are two basic styles of segmented wood turning: ring and stave. Stave construction is preferred for certain projects. The most common construction, however, is the ring. While each style has its merits, ring is the most popular and easiest to accomplish. This article will explain the differences between ring and stave construction, and how to apply them to your next segmented project.
Solid wood
When making solid wood segmented turnings, accuracy of miter angles is crucial. Depending on the size of the ring, segments may vary in width. PVA glue should be used with the grain against the grain to glue segments together. A pair of segments may be glued together simultaneously. These segments can be held together using clamping rings that are fitted with hose clamps. A miter angle of 22.5 degrees should be used for every eight segments.
Floating base
Segmented wood turnings should not be made with a flat base. A floating base is a way to prevent base failure and minimize stress on the piece. Floating bases are made from half-mortise joints where a solid dispersion fits in the space. Wood can move freely. Floating bases can be made from quarter-sawn lumber, which is more stable than plain-sawn. A floating base should be no larger than 6 inches in size.
FAQ
How much should a hobbyist invest to get started?
You will need capital to purchase the tools and supplies you need to start your woodworking business. A good place to start would be by buying a small table saw, drill press, circular saw, jigsaw, and sanding machine. These items aren’t too expensive so you won’t have to break the bank.
How does a beginner woodworker earn money?
Many people learn how to make furniture in order to set up an online business. However, if you're just getting into furniture building, there are other options than selling on Etsy. You could sell at craft fairs or local events. For those who want to build their own furniture, you might offer workshops. Consider offering your services if you have previous experience as a builder or carpenter.
What woods are suitable for making furniture?
Woods are classified by their hardness. Softwoods include pine, fir, cedar, and cypress. They're often used for outdoor furniture because they don't rot easily. These hardwoods include maple, mahogany and teak. They can't withstand the elements outside so they're best kept indoors.
Statistics
- In 2014, there were just over 237,000 jobs for all woodworkers, with other wood product manufacturing employing 23 percent; wood kitchen cabinets and countertop manufacturing employing 21 percent. (theartcareerproject.com)
- Woodworkers on the lower end of that spectrum, the bottom 10% to be exact, make roughly $24,000 a year, while the top 10% makes $108,000. (zippia.com)
- Most woodworkers agree that lumber moisture needs to be under 10% for building furniture. (woodandshop.com)
- Overall employment of woodworkers is projected to grow 8 percent from 2020 to 2030, about as fast as the average for all occupations. (bls.gov)
External Links
How To
How to join two pieces of wood together without nails
Woodworking is a favorite hobby. You can make useful items from wood with your hands, which is both relaxing and fun. You might want to join two pieces from the same wood, but you don't need to use nails. This article will show you how to do it to make your woodwork projects look great.
Before you can join the wood pieces together, you need to remove any rough edges. You don't want any sharp corners to cause problems later. Now you can start gluing the boards together.
If you're working with hardwood, you should only apply glue to one side. You should glue both sides if you are working with softwoods such as pine and cedar. Press the boards down until the glue is fully incorporated. Be sure to let the glue dry before you move on to the next step.
After you have glued your boards, drill holes where you want to insert screws. The size of these holes depends on what type of screw you choose to use. If you are going to use a half-inch wood screw, you will need to drill at least 3/4 inch deep.
Once you have drilled the holes, the next step is to drive your screws through the joint into the board's backside. Be careful not to hit the front surface of the board, or else you'll ruin the finish. Avoid hitting the screws' ends too often when driving screws. This will avoid splitting in the wood's ends grain.
After your project is completed, you will need to protect it from the weather. You can either cover the entire furniture or just the top. Either way, you'll want to use a product that will last for years to come. There are many options: oil-based varnishes; polyurethane; shellac; lacquer.
These products can be found in most home improvement shops. Make sure you get the right product for your job. Remember that some finishes can be toxic, so you should not use them indoors. When handling certain finishes, wear protective gear.