You will need to research which woods are best for carving your walking sticks before you begin. You will also want to know about various techniques for whittling and what David Allen uses to carve his walking sticks. Also, be sure to read some famous quotes about walking sticks and how to carve them. Here are some tips to help make the perfect walking sticks. You can read more to find out! This is how you can create a walkingstick that's unique and functional.
Woods that can be used to carve a walking stick
The most difficult part of carving is finding a blank that is straight. There may be a few branches that are too bent to be of use, but it is worth searching until you find one. When sap travels from the branches to the root, the winter months are the best time to harvest straight branches. This makes the wood more stable and less likely for splitting. You can harvest the wood as soon as the tree is green, even if it is too late for the spring.
A walking stick can be carved from many species of wood. North American chestnut wood is strong and durable. Its dense nature makes it an ideal wood for making walking sticks and similar tools. This species' wood grain is either slightly open or partially closed. It creates a strong walking stick with a smooth, solid feel. It is also quite attractive and is widely used in carving. Some species can be carved with the bark left in place.
Techniques for whittling a walking stick
A few simple techniques are required to carve a walking sticks. First, you should choose a piece of wood with a unique texture. Woods can have unique bark patterns and colors. Other woods may have natural swirls. You may want to enhance these features by using lacquer or paint. In addition, you may want to carve the wood shaft to make it more attractive. Last but not least, make sure you pick a straight stick free of branches or sharp spikes.
This book will explain the differences between different types of wood as well as different carving styles. Most common are snakes and Lions. Other than snakes, it is possible to carve realistic figures, such as fish, deer, and eagles. These artists are often regarded as God-given. This book can be used by both novice and advanced carvers.
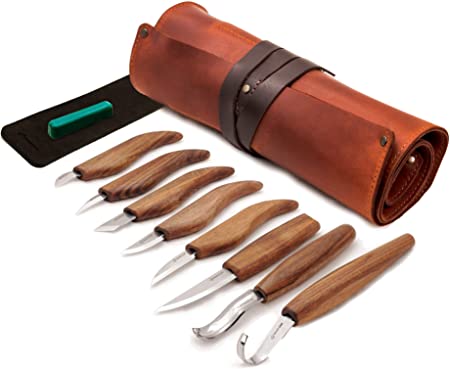
David Allen used these tools to carve his walking stick
David Allen started making toys when he was young. He used a pocketknife from his childhood to create them. He was too young to be able to use a knife so he kept it safe from his family. His creations included toys such as slingshots, and utilitarian objects such as shoeshine boxes. Allen, at 15 years old, became disabled and began carving walking stick. Allen used a pocketknife to cut the wood.
Allen created his designs alone, digging around the roots saplings to find out what to carve. Allen believed that design must be "seeable" before carving can begin. This was the same process as many other African-American artists. Allen had many visions and dreams of the design he wanted. This allowed him to create a stick that would resonate with the emotions and feelings of his community.
Famous quotes about carving a walking stick
Carving a walking stick requires complex skills and a solid blank. The hardest part of the project is finding a straight blank. You can find a wide variety of sources for your stick, but you must be persistent to find one that's straight. It may appear bent beyond practical use, but keep searching until you find one. When sap is flowing from the roots to the branches of the tree, it's best to trim your stick in winter. The sap makes the wood softer and less likely split.
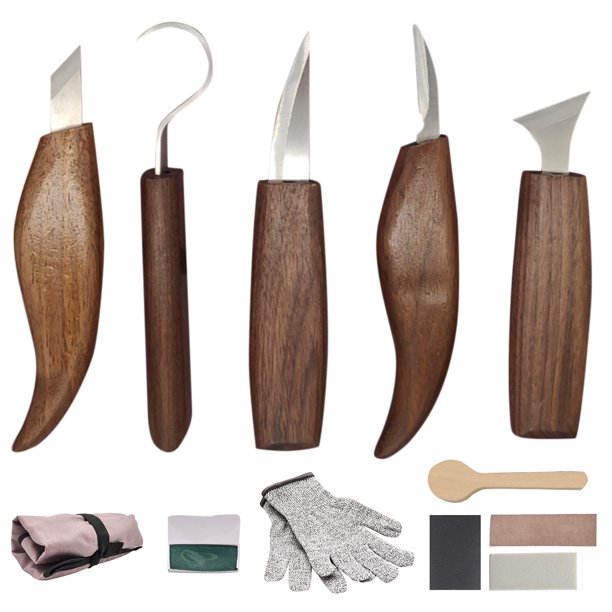
When choosing wood, consider the texture and color of the wood. Every piece of wood will have its own unique texture, color, and may show bark marks or swirls. You can enhance the natural swirls by applying lacquer. It is important that the wood shaft be free from any branch shoots or hard spikes in order to achieve a smooth finish. This will make it easier. No matter what material you choose to use, it is important that you consider the type and finish you will use.
FAQ
How long does it take to finish a piece of furniture?
It depends on the size and condition of the furniture. Boxes and picture frames are small projects that can be completed in one day. Larger projects such as tables and desks can take several days to complete. It takes time for the wood to be stained and sealed properly.
What is the hourly rate for a woodworker?
The hourly rate for a professional Woodworker will vary depending on many variables, such as experience, skill level and availability.
An hourly wage for skilled woodworkers is between $20 and $50.
A less experienced woodworker may charge as little as $10 an hour.
Where can I find my woodworking tools?
There are many places you can get everything you need, and you don't have to go far. You could go to your local hardware shop or visit websites such as Amazon.com.
You can also look for used furniture at flea markets or garage sales.
Statistics
- The best-paid 10 percent make $76,000, while the lowest-paid 10 percent make $34,000. (zippia.com)
- If your lumber isn't as dry as you would like when you purchase it (over 22% in Glen Huey's opinion…probably over 10-15% in my opinion), then it's a good idea to let it acclimate to your workshop for a couple of weeks. (woodandshop.com)
- Average lumber prices rose about 600 percent between April 2020 and May 2021. (familyhandyman.com)
- Most woodworkers agree that lumber moisture needs to be under 10% for building furniture. (woodandshop.com)
External Links
How To
How to drive a nail through wood
When driving a nail into wood, it is important to first choose the correct size and kind of hammer. The most common types of hammers are claw hammers, sledgehammers, mallets, ball peen hammers, and hatchets. Each kind of hammer has its own advantages and disadvantages. A claw hammer, for example, is the best choice if you need to hit nails hard. However, it's not easy to know exactly where the impact will land. A sledgehammer is great for hitting large areas at once, but it's too heavy to use effectively for smaller tasks.
Place your hand flat on the side of your chosen hammer so that the handle rests in your palm. Hold the handle in your hand, but don’t force it too hard that you break. Your wrist should be relaxed while you hold the hammer straight upwards. Swing the hammer back towards the ground, with your aim at the middle of the nail. You should feel the impact of the hammer striking the nail. If you're having trouble getting the hang of swinging a hammer, practice with a block of wood until you get the rhythm down.
You can now drive the nail by holding the hammer to your body. The nail should be perpendicular to wood's surface. Keep your focus on the tip of each nail. Move the hammer forward and then continue to move the hammerhead. This can be repeated several times to increase the speed of your swing. Once you have mastered this technique, increase the power of your swings. Hold the hammer high above your shoulders and pull it down. This way, you'll be able to put more energy behind your blows.
Once you've nailed the first hole, remove the hammer from the nail. Use a pry bar or screwdriver to pull out the rest of the nails. Keep the nails heads in line with the surface of the board to prevent splitting the wood.